• Skip to primary navigation
  • Skip to main content
  • Skip to primary sidebar

XIAOMI ADVICES

Xiaomi News Blog | MIUI ROM | Firmware Update | Custom ROM | Root | Android Apps | Lineage OS | Samsung |

Search icon
  • MIUI 14
  • Android 13
  • MIUI 13
  • Xiaomi USB Drivers
  • Root
  • How To
Trending 🔥
MIUI 14 Download MIUI 14 Features Xiaomi Android 13 Magisk Zygisk POCO Launcher Xiaomi Game Turbo 5.0 Mi Account Unlock Xiaomi USB Drivers
Home Tutorial Xiaomi Redmi Note 3 Fingerprint Scanner Setup (Tips & Tricks)

Xiaomi Redmi Note 3 Fingerprint Scanner Setup (Tips & Tricks)

FacebookTwitterReddit

Xiaomi Redmi Note 3 is the company first Android smartphone to have a fingerprint scanner not only to unlock the device but also to perform various other tasks. The sensor is located at the back of the device just below rear camera, and if you excited to know the different tasks of Redmi Note 3 sensor just read-on the following.
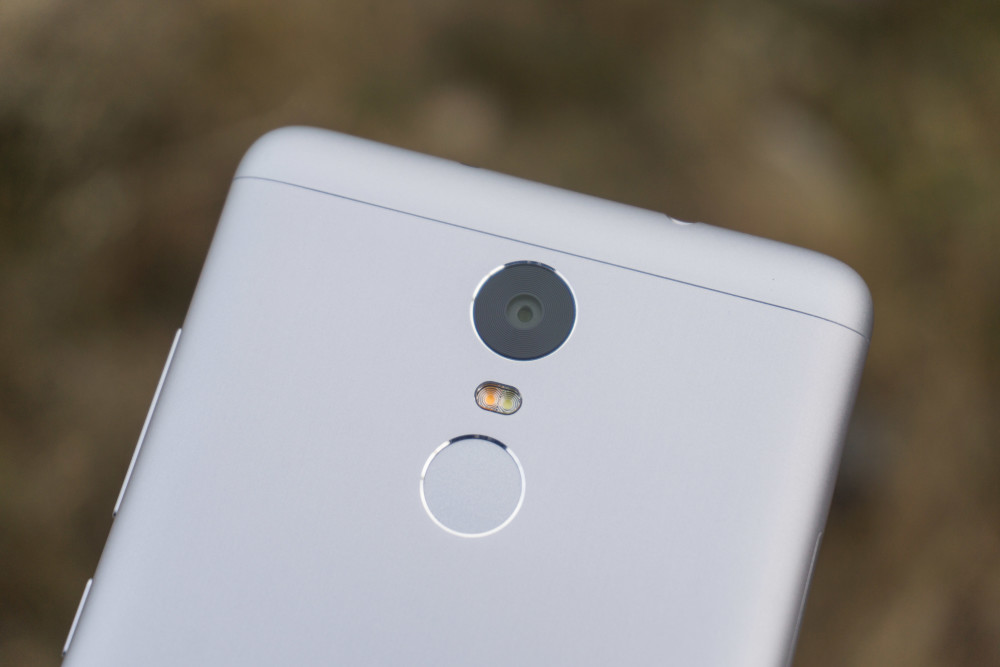
Xiaomi-Redmi-Note-3-pro-review 2

Uses of Redmi Note 3 fingerprint sensor

The sensor not only used for unlocking the device via fingerprint but also you can lip unlock, selfie capture, rear camera selfie capture, view hidden folders, app lock and third party apps login. You can store up to 5 Fingerprint profiles which includes not only fingerprints but also includes other body parts. We have already seen Hugo Barra unlocking the device using its lips at the Redmi Note 3 India launch event.

Many of you might have already purchased the device and might be looking for tutorial on how to Setup Redmi Note 3 Fingerprint scanner. Then your wait is completed as here we have shared the guide on the same. Just you need to follow the below steps one after another. Also how to remove Fingerprint lock from Xiaomi phones.

How to Setup & Use Fingerprint Scanner on Xiaomi Redmi Note 3

Firstly in order to access the fingerprint setup options head over to Settings > Lock screen & password > Password & fingerprint. Here first you need to setup backup password that could be any Pattern, PIN or Password. After successful setup one of these, next you need to place & lift your fingerprint for about 10 times. This is mandatory as the sensor collects different parts of the finger and saves it as a full fingerprint.

Note: The fingers should not be wet at the time of setting up the fingerprint scanner. This will either delay or not makes the sensor to identify the fingerprints.

For more Xiaomi Redmi Note 3 tutorials, tips & tricks, do visit HERE.

TwitterFacebookWhatsAppRedditBufferLinkedInPin It

Don't miss out

Download POCO Launcher 4.0 APK v4.38 – Latest Version

Download POCO Launcher 4.0 APK v4.38 – Latest Version

Xiaomi Phone Struck at Mi Logo – Solved!

Xiaomi Phone Struck at Mi Logo – Solved!

How to Enable USB Debugging Mode on Xiaomi Mi/Redmi phones

How to Enable USB Debugging Mode on Xiaomi Mi/Redmi phones

Download Xiaomi USB Drivers for Windows and Mac

Download Xiaomi USB Drivers for Windows and Mac

How to Remove Password/ PIN/ Pattern Lock on any Xiaomi MIUI phone

How to Remove Password/ PIN/ Pattern Lock on any Xiaomi MIUI phone

Reader Interactions

LEAVE A REPLY Cancel reply

Your email address will not be published. Required fields are marked *

Primary Sidebar

Find us on Facebook

Recent Posts

Download Latest Magisk zip v25.2 and Magisk Manager 8.0.7 and…

Download Latest Magisk zip v25.2 and Magisk Manager 8.0.7 and Root your Android Phone

Xiaomi MIUI 14 Update Download [Stable & Beta]

Xiaomi MIUI 14 Update Download [Stable & Beta]

Xiaomi 12 MIUI 14 Update Released for Global [Download]

Xiaomi 12 MIUI 14 Update Released for Global [Download]

How to Remove Glance for Mi from a Xiaomi, Redmi…

How to Remove Glance for Mi from a Xiaomi, Redmi or POCO Phone

What is Zygisk? How to use Zygisk on Android?

What is Zygisk? How to use Zygisk on Android?
  • About US
  • Privacy Policy
  • Contact Us / Advertising / Product & Apps Review

Copyright © 2023. Xiaomi Advices | This site is not an official Xiaomi website. Xiaomi and MIUI are properties of Xiaomi.